

- Version
- 12.4.16
- Studio or maker
- Ableton
- Languages
- English, German, Spanish, Italian, French, Japanese
- Activation
- Included
- Runs on macOS
- macOS 12 or later
- Chip type
- Apple Silicon, Intel 64-bit
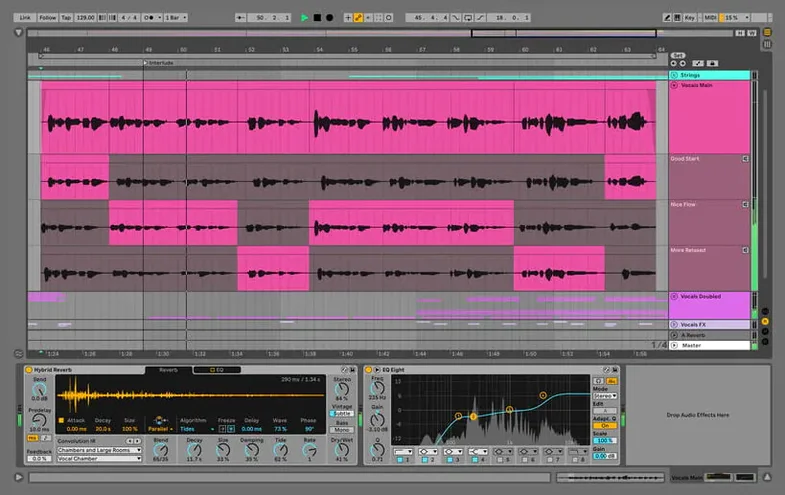
If you have spent enough time in Live to feel its session view like a second language, the 12.4.6 update is worth your attention. It keeps the same core — create, produce, perform in one window — but refines the parts that slow you down when working with many tracks.
What matters for experienced users
Beats Warp Mode with Transients Granular Resolution — A fix for a hang that could lock up rendering, bouncing, or consolidating in Sets with a high track count and audio clips in this warp mode. If you stack layers of percussion or vocal chops, this one matters.
Real-time synchronization — Live syncs content and works without stopping playback. Change a clip, hear it immediately.
Session view for performance — The same workspace you use for production doubles as a live performance tool. No separate mode, no export step.
Works on macOS 12 or later with Apple Silicon and Intel Macs
Will it run on my older Mac?
Live 12.4.6 requires macOS 12 or later. It works on both Apple Silicon and Intel Macs. If you are on an older macOS, you will need to check compatibility with an earlier Live version. The installer will tell you if the system is not supported.
Can I keep my current version of Live installed?
Yes. The 12.4.6 update does not force you to remove previous versions. You can keep Live 11 or an earlier Live 12 build alongside it. Just install to a separate folder or rename your existing application. Your preferences and project files stay separate.
Will my existing projects work?
Projects created in Live 12 can be opened in 12.4.6 without issues. If you plan to go back to an earlier 12.x version, save a copy of your project first – some new features or fixes may not be recognized by older builds.
Do I need to reinstall my third-party plugins?
No. Live scans the same plugin folders after the update. If you have custom plugin locations set in preferences, they carry over. Occasionally Live resets its cache after an update, so the first scan may take a few minutes longer than usual.
Let the library scan finish to avoid missing samples
The authorization window does not appear
After launching Live for the first time, drag the "Authorize.auz" file into the app window as instructed. If nothing happens, make sure the file is not blocked by macOS. Right-click the file and choose Open, then try again. If the app window does not respond, restart Live and attempt the drag again.
Live hangs when loading projects with many audio tracks
This is the exact scenario the 12.4.6 fix addresses – Beats Warp Mode with Transients Granular Resolution. If a project still hangs, try switching the warp mode on individual clips temporarily. Select a clip, change its warp mode to another option, render or bounce, then switch back. This workaround helps isolate the problem track.
Audio glitches or dropouts during playback
Check your audio buffer size in Preferences > Audio. A higher buffer reduces dropouts at the cost of higher latency. If you are using built-in audio, try an external interface. Also confirm that no other app is using the same audio driver – close browser tabs that may access the microphone.
AbletonAutoSave not working
This helper runs from the menu bar and saves your project at a set interval. If it does not appear, open the AbletonAutoSave app separately from the installation folder. Make sure it starts together with Live. You can also set the save interval from its menu bar icon.
Build a performance-ready live set from empty project to stage arrangement
Let Live scan your library fully.
The first launch triggers a library scan. Let it finish before opening a project. Interrupting the scan can cause missing samples or instruments. The progress bar in the status bar tells you when it is done.
Back up your preferences.
Live stores preferences in a file called Preferences.cfg. If you spent time customizing your template or default track settings, copy that file to a safe location. After any future update, you can drop it back in to save setup time.
Test the Beats Warp Mode fix on a small project first.
Create a test set with ten or more audio clips in Beats Warp Mode and Transients Granular Resolution. Render a section. If the process finishes without hanging, you are good to go on larger projects.
Check your plugin compatibility.
Some plugins may need updates for Live 12.4.6, particularly if they rely on older AU or VST3 versions. Visit the developer pages of your most-used plugins to confirm they support the current macOS version.
Using Beats Warp Mode fix to avoid hangs during export
This workflow covers creating a performance-ready set in Live 12.4.6, from empty project to stage-ready arrangement. It works with the session view and uses the Beats Warp Mode fix to avoid hangs during export.
Step 1 – Set up the template
Open Live 12.4.6 and start with the default empty set. In the session view, add four audio tracks and four MIDI tracks. Label them: Kick, Snare, Hi-Hat, Percussion for the audio tracks; Bass, Lead, Pad, FX for the MIDI tracks. Save this as a template so you can start every future live set from the same layout.
Step 2 – Load sounds and clips
Drag a kick drum audio clip into the first clip slot of the Kick track. Repeat for Snare, Hi-Hat, and Percussion. For the MIDI tracks, load instruments from the built-in library: Analog for Bass, Wavetable for Lead, Electric for Pad, and a simpler synth for FX. Adjust levels so nothing clips.
Step 3 – Warp the audio clips
If your audio clips are not already warped, enable warp for each clip and select Beats Warp Mode. Set the Transients Granular Resolution to a value that matches the clip content – lower values for rhythmic material, higher for detailed transients. Test by playing the clip in a loop; it should lock to the project tempo without clicks.
Step 4 – Build a basic arrangement in session view
Create a four-bar loop for each track. Launch the Kick clip, then add the Snare on the second bar. Bring in the Bass MIDI clip on the third bar. Use the scene launch buttons to trigger all clips at once. Test the transition by stopping and restarting the scene – session view handles this without interrupting playback.
Step 5 – Record a live improvisation
Click the global record button and start launching scenes in sequence. Play the Bass and Lead parts live using a MIDI controller if you have one. Live records everything into the arrangement view in real time. When you finish, stop recording.
Step 6 – Render the set
Go to File > Export Audio/Video. Choose the full project length. Set the format to WAV at 44.1 kHz, 24-bit. Click Export. Thanks to the 12.4.6 fix, this render should not hang even if you have many Beats-warped clips. If you plan to perform live, export individual stems as well – one per track – for backup.
Step 7 – Save and back up
Save the Live Set with a clear name. Enable AbletonAutoSave if you have it running. Copy the project folder to an external drive or cloud storage. If you perform the set live later, bring both the saved project and the exported stems in case your Mac needs a quick reload.
Ableton has posted the full list of changes for version 12.4.16 on their website — the update includes several refinements and fixes for both Live and Push.
- macOS 12 (Monterey) or later
- Apple Silicon and Intel 64-bit Macs
Questions I keep getting
What macOS versions does Ableton Live 12.4.6 support?
It is designed for macOS 12 and later, and runs on both Intel and Apple Silicon Macs.
What does the AbletonAutoSave tool do?
It runs alongside Ableton, saves projects at a set interval, and can be controlled from the menu bar. It starts and quits together with the app.
How to install
The Suite edition is a substantial download — set aside a few minutes for the 5.1 GB file to arrive — and it runs on macOS 12 or later across both Intel and Apple Silicon Macs.
- Mount the disk image and copy Ableton Live to your Applications folder, just like any regular Mac app.
- Launch the program once, then drag the "Authorize.auz" file straight onto the Ableton Live window to complete the authorization.
- If authorization doesn't stick, block Ableton Live's internet access via your firewall and double-check that the version number matches — the app can update itself silently in the background.
Similar apps






Sign in or join the club to leave a comment.
Nobody has commented yet.