
- Version
- 1.5.5 (13797)
- Studio or maker
- Skylum
- Languages
- English, German, Spanish, Italian, Chinese (Traditional), Chinese (Simplified), Korean, Dutch, Portuguese, French, Japanese
- Activation
- K'ed by TNT team
- Runs on macOS
- macOS 10.13.6 or later
- Chip type
- Apple Silicon, Intel 64-bit
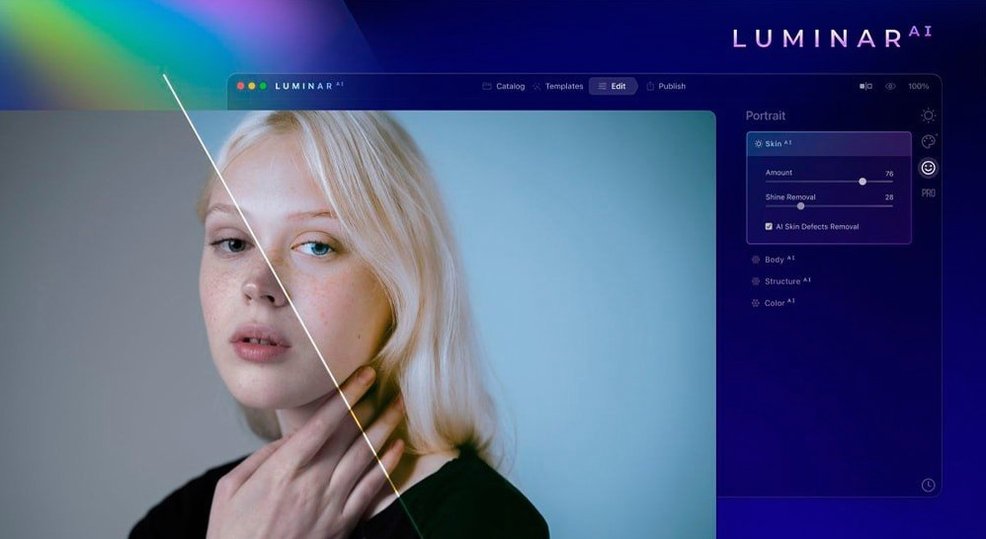
Luminar AI 1.5.5 works on any Mac running macOS 10.13.6 or later, including both Intel and Apple Silicon models. It runs as a standalone app or as a plugin for other editors.
How does Accent AI simplify editing?
One slider adjusts lighting and color across the whole image. It analyzes the scene and decides what needs fixing, so you don't have to tweak multiple controls.
What does Skin AI do that standard tools don't?
It removes blemishes while keeping pores, texture, and hair intact. The AI identifies skin areas and works only there, leaving the rest of the photo untouched.
Launches on both Intel and Apple Silicon Macs
Luminar AI 1.5.5 (13797) launches on any system that meets the macOS 10.13.6 minimum, whether you run an Intel Mac or an Apple Silicon model. The architecture support covers both ARM and 64-bit x86, so the installer works without extra steps on recent Macs. Because the app relies heavily on AI processing for tasks like sky replacement, facial adjustments, and bokeh simulation, the initial load of the application and the first use of each AI module may take a moment while the models initialize. After that, the tools respond without repeated delays. The interface language can be set to one of eleven options, including English, German, Spanish, Italian, Traditional Chinese, Simplified Chinese, Korean, Dutch, Portuguese, French, and Japanese, which is useful if you share the machine with colleagues or students who prefer another language. The app runs either as a standalone editor or as a plugin hooked into other photo software, so you can choose the workflow that suits your habits.
Set your default language in Preferences
Before you start editing, open the preferences and set your default language if it differs from the system language. This avoids confusion when tooltips and panel names switch to a language you do not read easily. Next, decide whether you want Luminar AI to act as a plugin or a standalone app. If you already use another editor, enabling the plugin mode lets you send photos back and forth without leaving your main workspace. In standalone mode, you manage files directly from the app's library view, which some users find simpler for batch work. Finally, check the file handling options: you can choose whether the app creates sidecar files or edits originals in place. Sidecar files are safer for experimentation because they preserve the original image data.
Edit one portrait with the AI tools in sequence
Here is a step-by-step workflow for editing one portrait from start to finish. It uses several of the AI tools in sequence and shows how they fit together.
- Open your photo in the standalone app or send it from your plugin host. Let the image load fully so the AI modules have all the data they need.
- Apply Skin AI first. The tool scans the face and body for blemishes, then removes them while keeping pores, texture, and hair intact. Adjust the strength slider until the skin looks natural but clean.
- Use Face AI to adjust broader facial features and remove dark circles under the eyes. The AI identifies the face region and applies corrections only there, so the background stays unchanged.
- Switch to Iris AI if the subject's eyes need brightening or color adjustment. The tool detects the iris and modifies it without affecting the rest of the eye or surrounding skin.
- Add atmosphere with Atmosphere AI. Choose from fog, cloudiness, haze, steam, or drizzle. A subtle mist can add depth; a heavier effect works for moody portraits.
- Finish with Accent AI to balance overall lighting and color in one slider pull. The AI analyzes the scene and adjusts contrast, exposure, and saturation together, giving the image a polished final look without extra manual steps.
This order works because you handle local corrections first, then add atmosphere, and finally let Accent AI unify the whole frame. If you prefer a different sequence, the tools do not depend on each other, so you can rearrange freely.
Compare Luminar AI results with your previous edits
Start with photos you already know well. Load images you have edited before in other software and compare the results from Luminar AI. This gives you a baseline for how much each AI tool changes the image and lets you adjust the sliders with confidence.
Use the undo and reset buttons frequently while you learn. Each AI tool remembers its last state, so you can toggle the effect on and off to see what was altered. If a result does not look right, reset that module alone instead of starting over.
Work with copies of your originals during the first few sessions. Even though the app handles edits nondestructively when sidecar files are enabled, having a separate backup folder removes any worry about accidentally saving over the source image.
Try one AI tool at a time until you understand its range. For example, spend an afternoon testing only Sky AI on different landscape shots: swap the sky, adjust the blend, and see how the tool handles horizon lines and trees. Once you have a feel for each module individually, you can combine them without guessing which slider caused an unexpected change.
If you share the Mac with others, set the interface language to the one they read best. The eleven languages cover most European and East Asian users, so students or colleagues who prefer Spanish, Dutch, or Traditional Chinese can work without translation guesswork.
It applies rule-of-thirds and other composition guidelines automatically. The tool suggests a crop that improves balance and focus, saving time on manual framing.
- macOS 10.13.6 or later
- Intel or Apple Silicon
How to install
- Mount the disk image and open the app marked as Gatekeeper-friendly.
- Press Enter in Terminal to bypass Gatekeeper.
- Drag the app to the Applications folder.
- Open the app from Applications.
Similar apps





Sign in or join the club to leave a comment.
Nobody has commented yet.